Classic Homemade Cinnamon Swirl Bread: How to Bake the Perfect Loaf
Jump To:
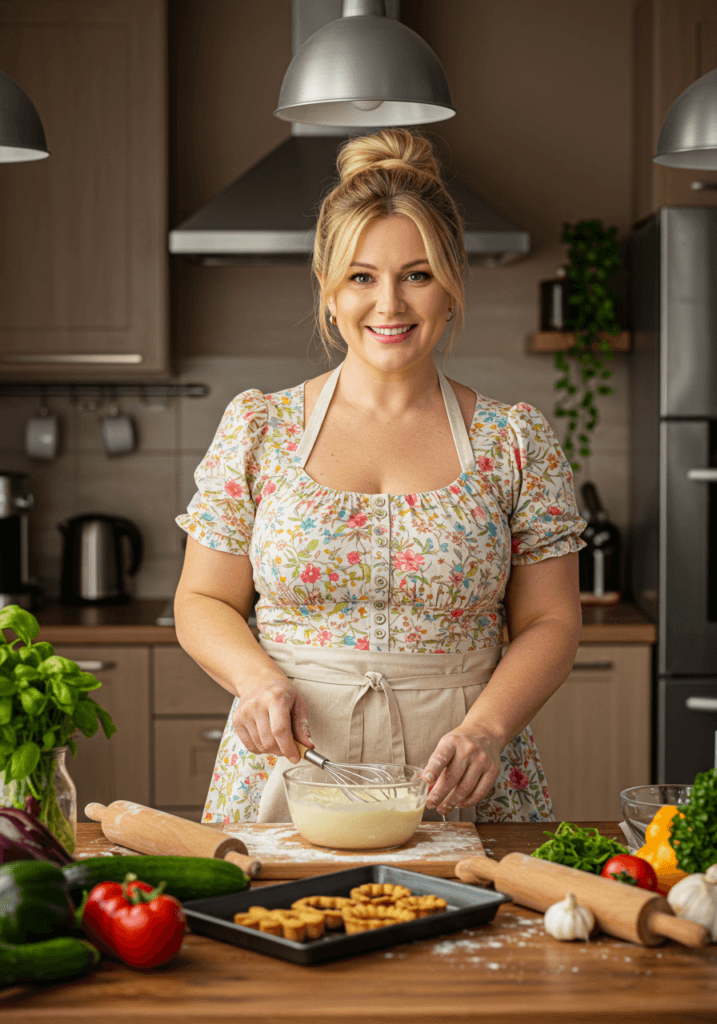
There's something magical about the aroma of Classic Homemade Cinnamon Swirl Bread wafting through your kitchen. That intoxicating scent of warm cinnamon and yeast promises comfort in every slice. I've spent years perfecting this recipe, and today I'm sharing all my secrets for creating that bakery-quality cinnamon swirl bread right in your own kitchen. Whether you're a seasoned baker or trying your hand at homemade bread for the first time, this recipe delivers consistent, delicious results that will have your family crowding around the cooling rack, unwilling to wait for that first heavenly slice.
Why This Classic Homemade Cinnamon Swirl Bread Recipe Works
Before we dive into the process, let's talk about what makes this Classic Homemade Cinnamon Swirl Bread recipe special. Unlike store-bought versions that often contain preservatives and artificial flavors, this homemade version relies on simple, quality ingredients. The dough is enriched with butter and eggs for a tender, soft texture, while the perfect ratio of cinnamon to sugar creates that signature swirl that makes each slice a work of art.
This recipe has been tested dozens of times to ensure the bread rises properly, the swirl stays intact, and the flavor balances sweet and spicy notes perfectly. The technique I'll show you prevents the dreaded "gap" that often forms between the swirl and the bread, ensuring picture-perfect slices every time.
Essential Ingredients for Perfect Cinnamon Swirl Bread
For the Bread Dough:
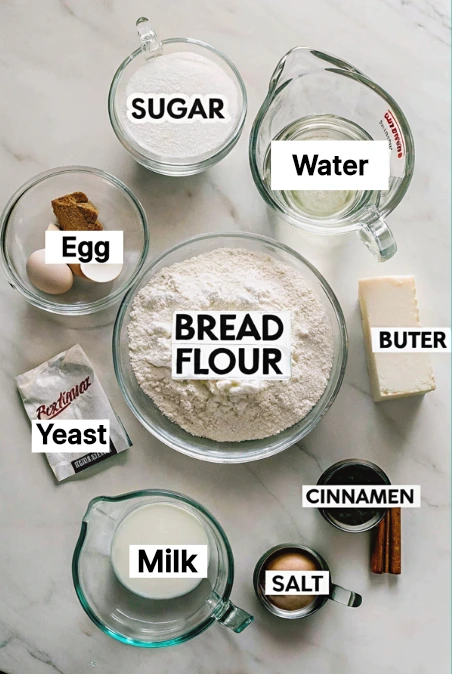
4 cups all-purpose flour (plus extra for dusting)
1/3 cup granulated sugar
2 1/4 teaspoons active dry yeast (1 standard packet)
1 teaspoon salt
1/2 cup whole milk, warmed to about 110°F
1/4 cup water, warmed to about 110°F
5 tablespoons unsalted butter, softened
2 large eggs, at room temperature
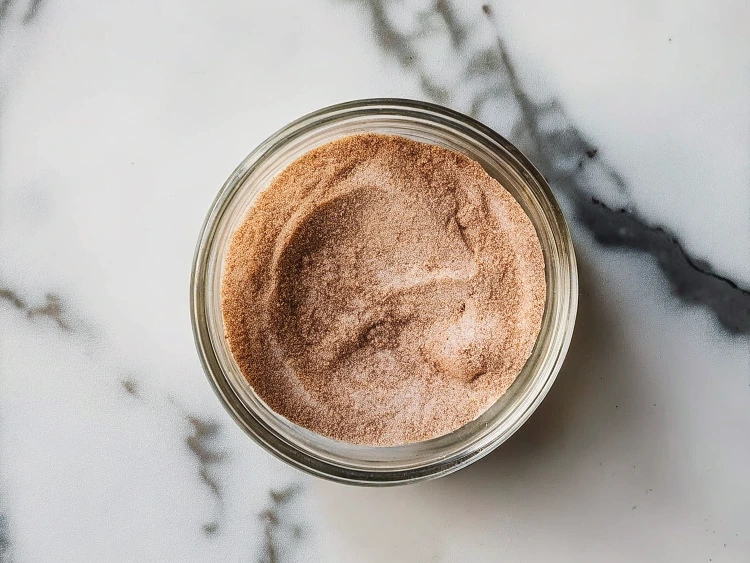
For the Cinnamon Filling:
1/3 cup granulated sugar
1/3 cup light brown sugar, packed
2 tablespoons ground cinnamon
3 tablespoons unsalted butter, melted
1 teaspoon vanilla extract
Egg Wash:
1 large egg
1 tablespoon milk
The quality of your cinnamon matters tremendously in this Classic Homemade Cinnamon Swirl Bread. Invest in fresh, high-quality cinnamon for the most aromatic and flavorful results. Ceylon cinnamon offers a more delicate flavor, while cassia cinnamon (the most common variety in American supermarkets) provides that bold, spicy flavor we often associate with cinnamon rolls and baked goods.
Equipment You'll Need
Before starting your Classic Homemade Cinnamon Swirl Bread journey, gather these tools:
Step-by-Step Instructions for Classic Homemade Cinnamon Swirl Bread
Preparing the Dough
Mix the dry ingredients: In the bowl of your stand mixer, whisk together 2 cups of flour, sugar, yeast, and salt.
Add wet ingredients: With the mixer on low speed using the dough hook, gradually add the warm milk, water, softened butter, and eggs. Mix until combined, about 2 minutes. The mixture will be quite sticky at this point.
Incorporate remaining flour: Add the remaining flour, 1/2 cup at a time, until the dough forms a soft ball that pulls away from the sides of the bowl. You might not need all the flour, or you might need a touch more—the perfect dough will be slightly tacky but not sticky.
Knead the dough: Increase the mixer speed to medium and knead for 6-8 minutes until the dough is smooth and elastic. Alternatively, turn the dough onto a floured surface and knead by hand for about 10 minutes.
First rise: Place the dough in a lightly greased bowl, cover with plastic wrap or a clean kitchen towel, and let rise in a warm spot until doubled in size, about 1 to 1.5 hours.
Creating the Perfect Cinnamon Filling
While your dough rises, prepare the cinnamon filling for your Classic Homemade Cinnamon Swirl Bread:
In a medium bowl, combine granulated sugar, brown sugar, and ground cinnamon.
Add the melted butter and vanilla extract, stirring until the mixture resembles wet sand. This method ensures even distribution of cinnamon and prevents the filling from leaking out during baking.
Set aside until ready to use. If the mixture firms up, microwave for 10 seconds to soften slightly before spreading.
Shaping Your Cinnamon Swirl Bread
This is where the magic happens! Let's create those beautiful swirls:
Punch down the dough: Once the dough has risen, press it down lightly to eliminate any trapped air.
Roll out the dough: On a lightly floured surface, roll the dough into a rectangle approximately 18x9 inches.
Apply the filling: Brush the surface with 1-2 tablespoons of water or milk (this helps the filling adhere), then evenly spread the cinnamon-sugar mixture, leaving a 1/2-inch border along all edges.
Create the swirl: Roll the dough snugly from the shorter side, then seal the seam and ends by pinching them firmly.
Shape the loaf: Transfer the rolled dough into a greased 9x5 inch loaf pan, positioning it seam-side down.
Second Rise and Baking
Final rise: Cover the loaf with a clean kitchen towel and let rise in a warm place until the dough rises about 1 inch above the pan's edge, approximately 45-60 minutes.
Preheat: About 20 minutes before baking, preheat your oven to 350°F (175°C).
Egg wash: Whisk together the egg and tablespoon of milk. Gently brush the top of your risen loaf with this mixture to promote a golden-brown crust.
Bake:Bake the bread for 40 to 45 minutes, or until the crust turns a deep golden color and the bottom sounds hollow when gently tapped. If the top begins to darken too quickly, loosely tent it with aluminum foil to prevent overbrowning.
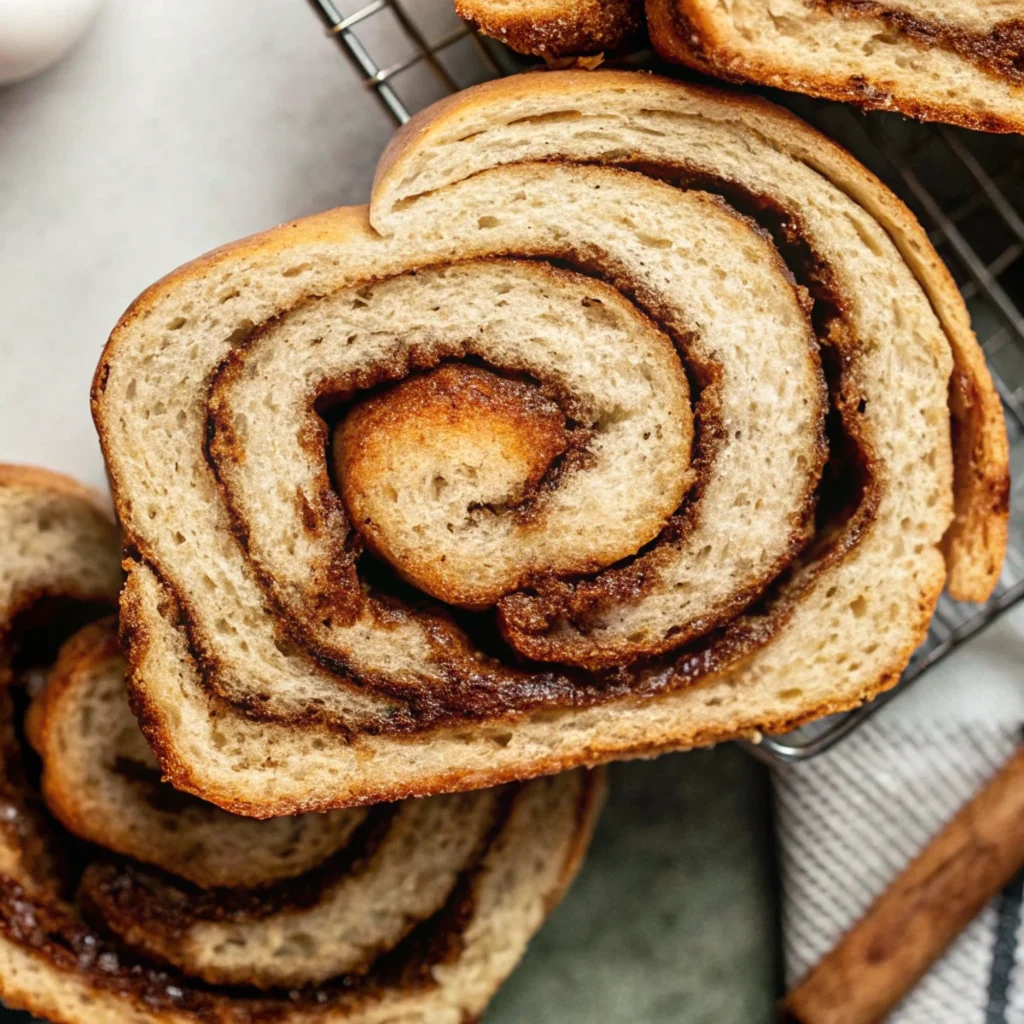
Cool: Allow the Classic Homemade Cinnamon Swirl Bread to cool in the pan for 10 minutes, then transfer to a wire rack to cool completely before slicing.
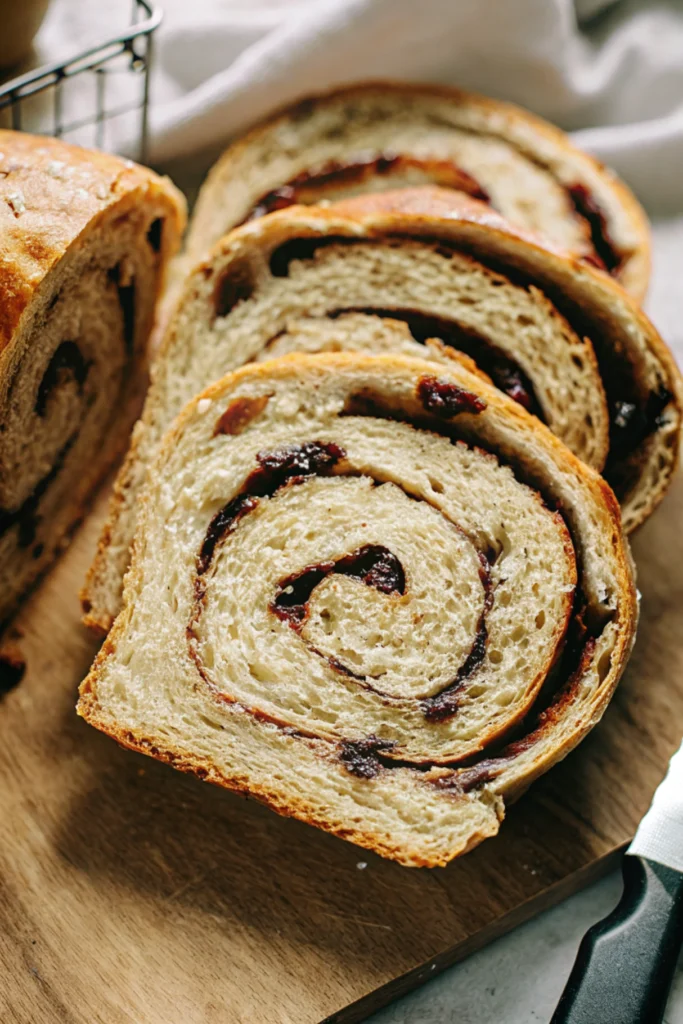
How to Achieve the Perfect Swirl in Your Bread
The most visually striking element of Classic Homemade Cinnamon Swirl Bread is, of course, the swirl! Here are my professional tips for swirl perfection:
Roll tightly: To get a tight, even swirl, roll the dough with steady pressure—enough to hold the shape without pulling or tearing the dough.
Proper filling consistency: The filling should be spreadable but not runny. If it's too wet, it will leak out; too dry, and it won't adhere.
Dampen the dough: Brushing the surface of the dough with water or milk ensures the filling adheres properly during rolling.
Seal properly: Pinch the seams and ends firmly to prevent the filling from escaping during baking.
Sharp knife technique: When cutting the finished bread, use a sharp serrated knife and a gentle sawing motion to avoid crushing the swirl.
Troubleshooting Common Cinnamon Swirl Bread Problems
Even experienced bakers encounter issues when making Classic Homemade Cinnamon Swirl Bread. Here's how to solve them:
Filling Gap Problem
That disappointing space between the swirl and the bread is a common issue. To prevent it:
Roll the dough tightly and evenly
Don't use too much filling
Make sure your dough is properly hydrated
Let the shaped loaf rise just until it's about 1 inch above the pan (over-proofing can cause gaps)
Filling Leakage
If your filling leaks out and burns on the bottom of the pan:
Avoid over-buttering the filling
Ensure your edges are completely sealed
Try the water/milk method mentioned above rather than butter to adhere the filling
Dense or Heavy Bread
If your Classic Homemade Cinnamon Swirl Bread turns out dense:
Check your yeast (is it fresh and active?)
Allow sufficient rising time (be patient!)
Don't add too much flour during kneading
Knead thoroughly to develop gluten structure
Making Ahead and Storage Tips
One of the wonderful things about Classic Homemade Cinnamon Swirl Bread is that you can prepare it in advance:
Make-Ahead Options:
Overnight first rise: After making the dough, place it in the refrigerator overnight for the first rise. The slow, cold fermentation actually improves flavor!
Freeze the dough: You can freeze the shaped dough right after the initial rise by placing it directly in the loaf pan. Thaw overnight in the refrigerator, then allow to come to room temperature and rise before baking.
Freeze baked bread: Completely cooled bread can be tightly wrapped and frozen for up to 3 months.
Storage Recommendations:
Store cooled Classic Homemade Cinnamon Swirl Bread in an airtight container at room temperature for up to 3 days.
For longer storage, refrigerate for up to a week.
Refresh slightly stale bread by toasting individual slices.
Delicious Ways to Enjoy Your Cinnamon Swirl Bread
Your freshly baked Classic Homemade Cinnamon Swirl Bread deserves to be showcased! Here are some delightful ways to enjoy it:
Classic toast: Simply toast a slice and spread with butter for a simple, heavenly treat.
French toast: Cinnamon swirl bread makes the most incredible French toast imaginable. Dip slices in an egg and milk mixture, then fry until golden.
Bread pudding: Use slightly stale cinnamon swirl bread for an elevated bread pudding with extra cinnamon flavor already built in.
Ice cream sandwich: For a special dessert, place a scoop of vanilla ice cream between two slices of cinnamon swirl bread.
Grilled PB&J: Make a peanut butter and jelly sandwich with your bread, then grill it like a grilled cheese. The warm cinnamon complements the fillings beautifully.
Variations on Classic Homemade Cinnamon Swirl Bread
Once you've mastered the basic recipe, try these delicious variations:
Raisin Cinnamon Swirl Bread
Mix in a cup of rehydrated raisins—soaked in hot water for 10 minutes and patted dry—into the cinnamon filling before rolling the dough.
Cream Cheese Filled Cinnamon Bread
Spread a thin layer of sweetened cream cheese (8 oz cream cheese + 1/4 cup sugar + 1 teaspoon vanilla) over the dough before adding the cinnamon filling.
Apple Cinnamon Swirl Bread
Add 1 cup of finely diced apples tossed with a tablespoon of flour to the filling for a fall-inspired variation.
Chocolate Cinnamon Swirl Bread
Add 1/2 cup mini chocolate chips to the filling for a chocolate-lovers version.
Why Homemade Bread Beats Store-Bought Every Time
There's simply no comparison between fresh Classic Homemade Cinnamon Swirl Bread and the pre-packaged variety. Here's why making your own is worth the effort:
No preservatives or additives: You control exactly what goes into your bread.
Superior flavor: The depth of flavor in homemade bread is unmatched by mass-produced versions.
Customizable: Adjust the cinnamon level, sweetness, and add-ins to suit your preference.
Freshness: Nothing compares to bread warm from your oven.
Sense of accomplishment: The pride you'll feel when presenting your beautiful creation is immeasurable!
Final Tips for Cinnamon Swirl Bread Success
Before you begin your Classic Homemade Cinnamon Swirl Bread adventure, keep these final tips in mind:
Temperature matters: Ensure your liquids are warm (not hot) and your eggs are at room temperature for the best dough development.
Be patient: Good bread takes time. Don't rush the rising periods.
Trust your instincts: The exact amount of flour needed may vary based on humidity and other factors. You’re aiming for a dough texture that’s soft and just a bit tacky to the touch, but not overly sticky.
Cool completely: As tempting as it is to slice into warm bread, allowing it to cool completely helps set the structure for clean slices.
Enjoy the process: making bread blends creativity with technique. Enjoy the process!
Creating your own Classic Homemade Cinnamon Swirl Bread is a rewarding experience that fills your home with incredible aromas and provides your family with a special treat made with love. After trying this homemade version, store-bought bread simply won’t compare.
Time to Start Baking!
Now that you're equipped with all the knowledge needed to create the perfect Classic Homemade Cinnamon Swirl Bread, it's time to roll up your sleeves and get baking! I'd love to hear how your bread turns out. Share your baking success stories in the comments below, or tag me in your social media posts with #HomemadeCinnamonBread.
If you enjoyed this recipe, don't forget to subscribe to my newsletter for more tested, foolproof recipes delivered straight to your inbox. Happy baking!
Frequently Asked Questions About Classic Homemade Cinnamon Swirl Bread
Can I make Classic Homemade Cinnamon Swirl Bread without a stand mixer?
Absolutely! While a stand mixer makes the process easier, you can mix the dough by hand with a wooden spoon until it becomes too thick, then turn it out onto Use a lightly floured surface to knead the dough by hand for 10 minutes, until it becomes smooth and stretchy.
What causes the cinnamon swirl to pull away from the bread?
This common issue usually happens when the filling is too dry or the dough wasn't rolled tightly enough. Try lightly brushing the dough with water or milk before adding the filling, and make sure to roll the dough firmly but without stretching it.
Is it possible to substitute active dry yeast with instant yeast?
Yes! You can replace active dry yeast with instant yeast in equal amounts without adjusting the recipe. The benefit of instant yeast is that it doesn't need to be dissolved in liquid first—you can add it directly to your dry ingredients.
How can I tell when the Cinnamon Swirl Bread is fully baked?
A properly baked loaf will have a golden crust and sound hollow when tapped on the bottom. To be sure, use a thermometer to check for an internal temp of about 190°F (88°C).
Can I make this bread gluten-free?
Converting yeasted bread recipes to gluten-free can be challenging because gluten provides the structure. However, you can experiment with a 1:1 gluten-free flour blend designed for bread baking. You may need to add xanthan gum if your blend doesn't already include it.
Want to try the full version with all the exact steps and tips? Check out the full recipe here: Gluten-Free Cinnamon Swirl Bread
This Classic Homemade Cinnamon Swirl Bread brings bakery-quality flavor straight to your kitchen. With tender, enriched dough and a bold cinnamon-sugar filling, it’s the perfect balance of comfort and indulgence. Whether toasted for breakfast or used in French toast, this loaf is sure to impress.
Ingredients Overview
For the Dough:
4cups all-purpose flour
1/3cup granulated sugar
2 1/4tsp active dry yeast
1tsp salt
1/2cup warm whole milk (110°F)
1/4cup warm water (110°F)
5tbsp unsalted butter (softened)
2large eggs (room temp)
For the Filling:
1/3cup granulated sugar
1/3cup light brown sugar (packed)
2tbsp ground cinnamon
3tbsp unsalted butter (melted)
1tsp vanilla extract
Egg Wash:
1large egg
1tbsp milk
Instructions
1
In a mixing bowl, whisk together 2 cups of flour, sugar, yeast, and salt.
2
Add warm milk, warm water, softened butter, and eggs to the bowl.
3
Mix on low speed for 2 minutes until combined.
4
Gradually add remaining flour, 1/2 cup at a time, until dough is soft and pulls from the bowl.
5
Knead dough for 6–8 minutes using mixer or 10 minutes by hand until smooth and elastic.
6
Place dough in a greased bowl, cover, and let rise until doubled in size, about 1 to 1.5 hours.
7
Prepare the filling: mix both sugars, cinnamon, melted butter, and vanilla until like wet sand.
8
Punch down the dough and roll into an 18x9-inch rectangle on a floured surface.
9
Brush surface lightly with water or milk to help filling stick.
10
Spread cinnamon filling evenly over dough, leaving 1/2-inch border on all sides.
11
Roll up dough tightly from the short end and pinch the seam and ends to seal.
12
Place the dough seam-side down into a greased 9x5-inch loaf pan.
13
Cover and let rise again until loaf rises 1 inch above pan, about 45–60 minutes.
14
Preheat oven to 350°F (175°C).
15
Brush the top with egg wash (1 beaten egg mixed with 1 tbsp milk).
16
Bake for 40–45 minutes, tenting with foil if browning too fast.
17
Remove from oven and cool in pan for 10 minutes, then transfer to wire rack.
18
Cool completely before slicing with a serrated knife.
Nutrition Facts
Servings 12
Serving Size 1 slice (1/12 of loaf)
Amount Per Serving
Calories220kcal
% Daily Value *
Total Fat6g10%
Saturated Fat3.5g18%
Cholesterol45mg15%
Sodium180mg8%
Potassium70mg2%
Total Carbohydrate35g12%
Dietary Fiber1g4%
Sugars12g
Protein5g10%
* Percent Daily Values are based on a 2,000 calorie diet. Your daily value may be higher or lower depending on your calorie needs.
Tag #recipesspot to get featured! Follow @recipesspot_olivia for daily food ideas and step-by-step recipes.
Pin this recipe to share with your friends and followers.
Olivia
Food and Lifestyle Blogger
Hi, I'm Olivia, a full-time food blogger, mother of 2 beautiful daughters and a lovely wife. I live in New York with my family. Loves traveling, sharing new recipes, and spending time with my family.